- Published on
From 3D to 2D Webtoon: Crafting a Cel Shading and Outline Pipeline via Post-Processing
- Authors
- Name
- Nori
- 3D Artist
As the standards of webtoon readers continue to rise, the scale and directorial density required for backgrounds have become incredibly sophisticated. Endless capital cities of great empires, complex cyberpunk metropolises, or majestic nature shrouded in thick fog—traditional lightweight 3D tools clearly had their limits in handling the sheer volume of polygon data and the need for high-tier lighting quality.
At this juncture, we decided to adopt Unreal Engine as the core of our webtoon pipeline. The challenge was to freely construct massive world-building within the engine while simultaneously achieving the familiar, signature look of webtoons all at once.
I still cannot forget the moment we first placed the artist's 2D character drawings onto our fully lit Unreal background. The rich indirect lighting and photorealistic textures generated by the engine were magnificent on their own. However, the moment a 2D character—condensed into simple lines and planes—stood upon it, there was a jarring disconnect, as if a sticker had been crudely pasted onto a live-action photograph.
To bridge this massive gap, we devised a method utilizing Post-Processing—the final stage of rendering—to flatten realistic lighting into 2D planes for cel shading, and then render organic, hand-drawn pen strokes directly on top of it.
This article chronicles our team's webtoon LookDev journey as we struggled to close the daunting aesthetic gap between 3D backgrounds and 2D characters. We want to share our fierce deliberations—how we intentionally compromised and blurred the engine's mechanical perfection to find harmony within a single canvas: the comic manuscript.
Why 'Post-Process' Instead of Materials?
Usually, when thinking of cel shading, modifying the materials of individual objects is the first approach that comes to mind. However, for artists who must crank out new backgrounds every week under the grueling schedule of weekly serialization, efficiency is a matter of survival.
What if we had to manually tweak countless materials every time we brought in external marketplace assets or previously made props? This would mean a fatal bottleneck in the pipeline and an absolute maintenance nightmare. Therefore, we opted for an 'integrated processing approach' where artists can freely set up the background as usual, and a camera filter universally converts the entire screen into a webtoon style. Thanks to this, we were able to preserve the artists' freedom of workflow while securing visual consistency all at once.
Step 1. Painting the Planes: Flattening the Light
The reason 3D modeling looks photorealistic is due to the soft flow of light forming on its surfaces. We forcibly flattened these complex calculations. By dividing the engine's final rendered image (PostProcessInput0) by the object's intrinsic color data (Base Color), we extracted a pure 'black-and-white lighting mask.'
Using this mask as our Alpha, we chose to blend the original Base Color and a darkened Base Color using a Lerp (Linear Interpolation) node. Instead of a light gradient spanning dozens of steps, we compressed the colors into clear illuminated and shadowed planes, completing the flat look characteristic of cartoons.
What we paid special attention to here was the flexibility to handle the mood. We embedded sliders to adjust the position and contrast of the light-and-dark Threshold, allowing precise control over the shadow boundaries. We also made the Tint colors of the highlights and shadows adjustable, enabling artists to freely match the genre's mood without needing to tweak the actual lighting setup.
Below are comparison images: before applying the cel-shader, after applying it, and after adjusting the Tint colors.
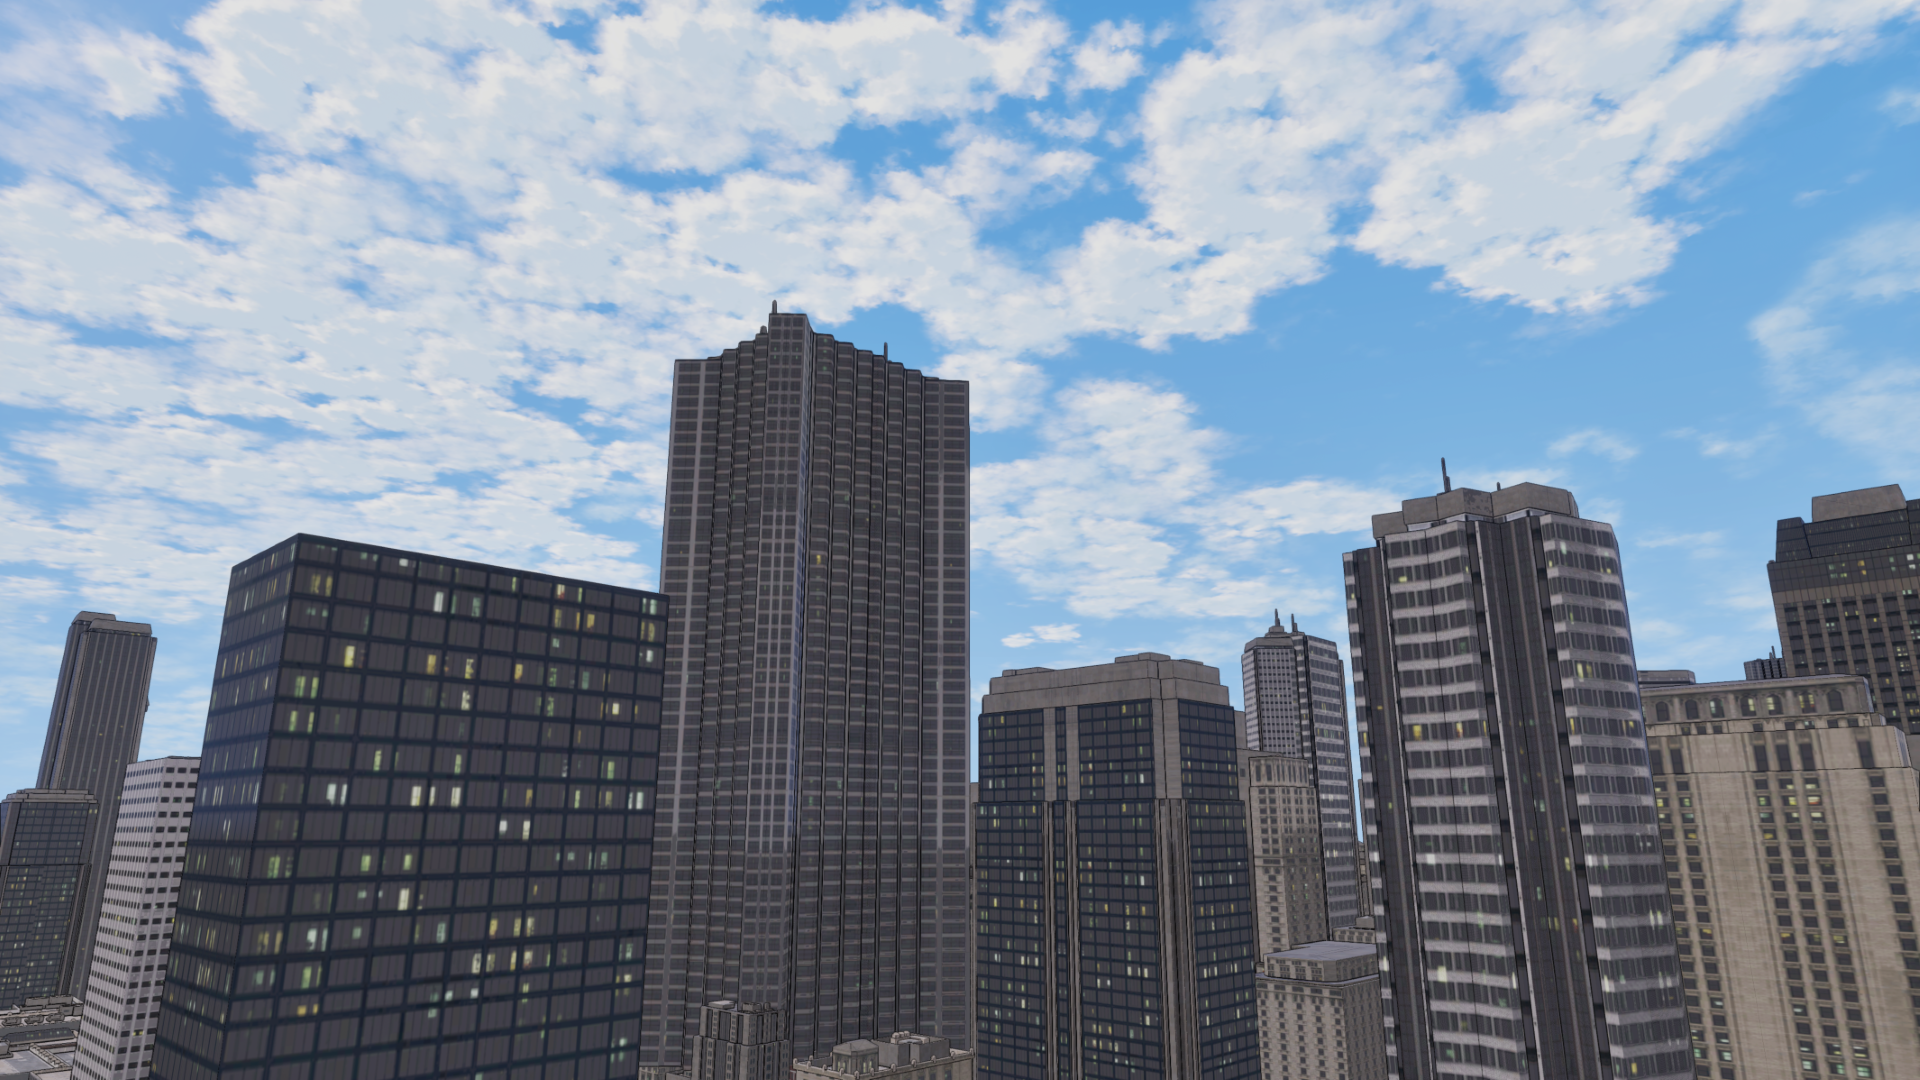
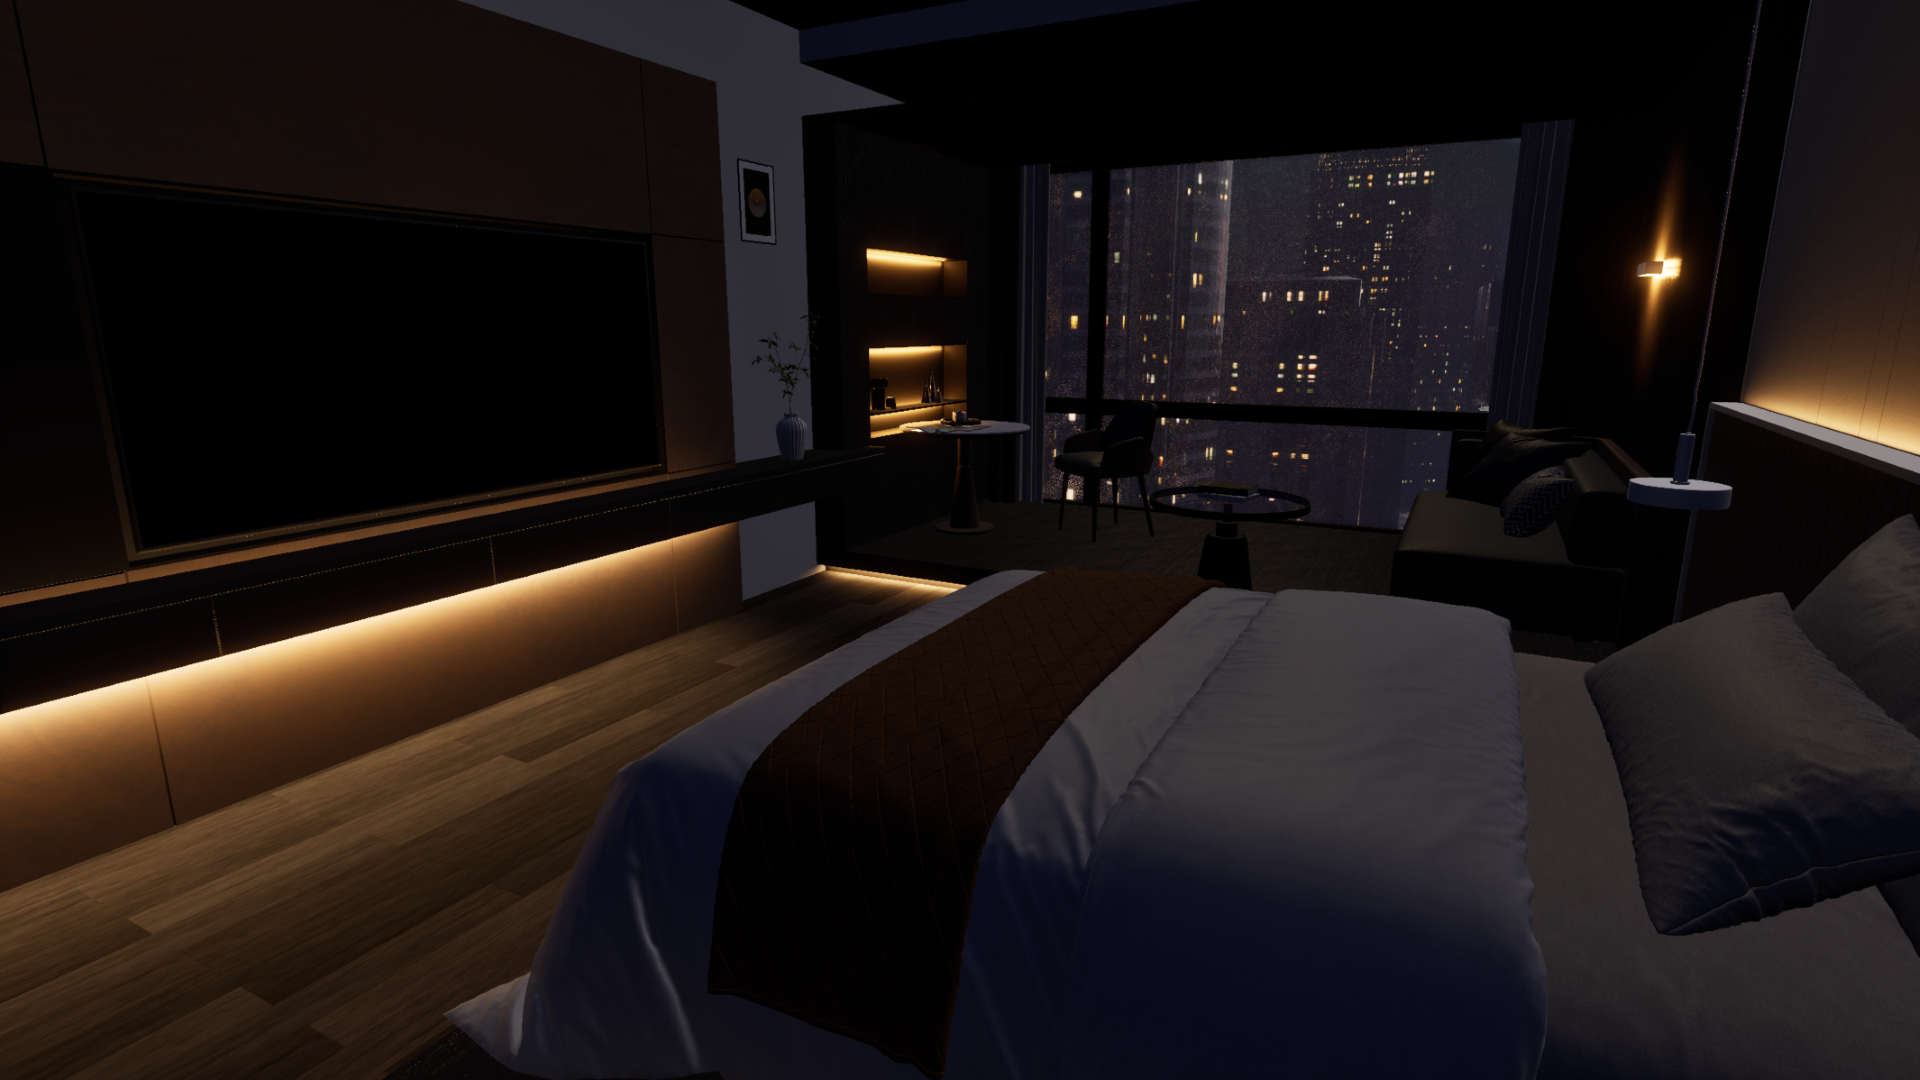 Cinematic (Before Shader)
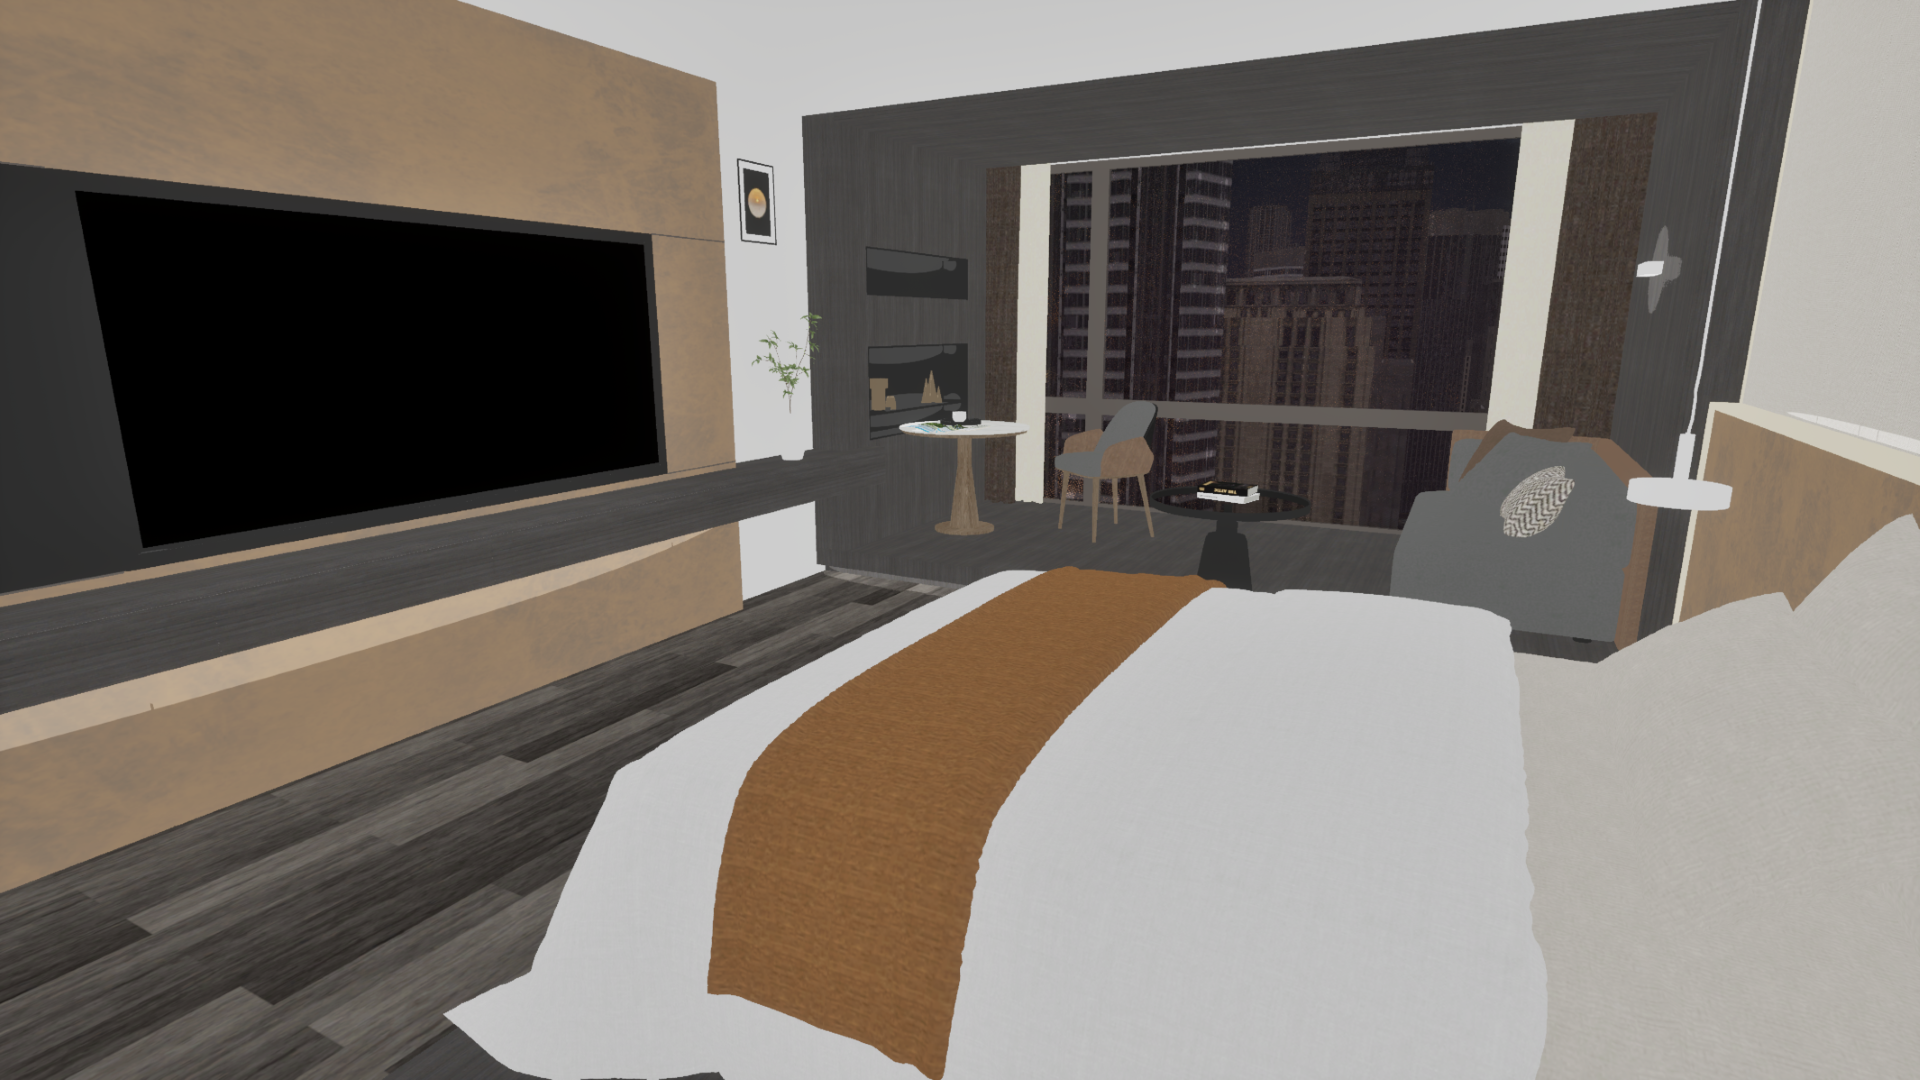 After Shader
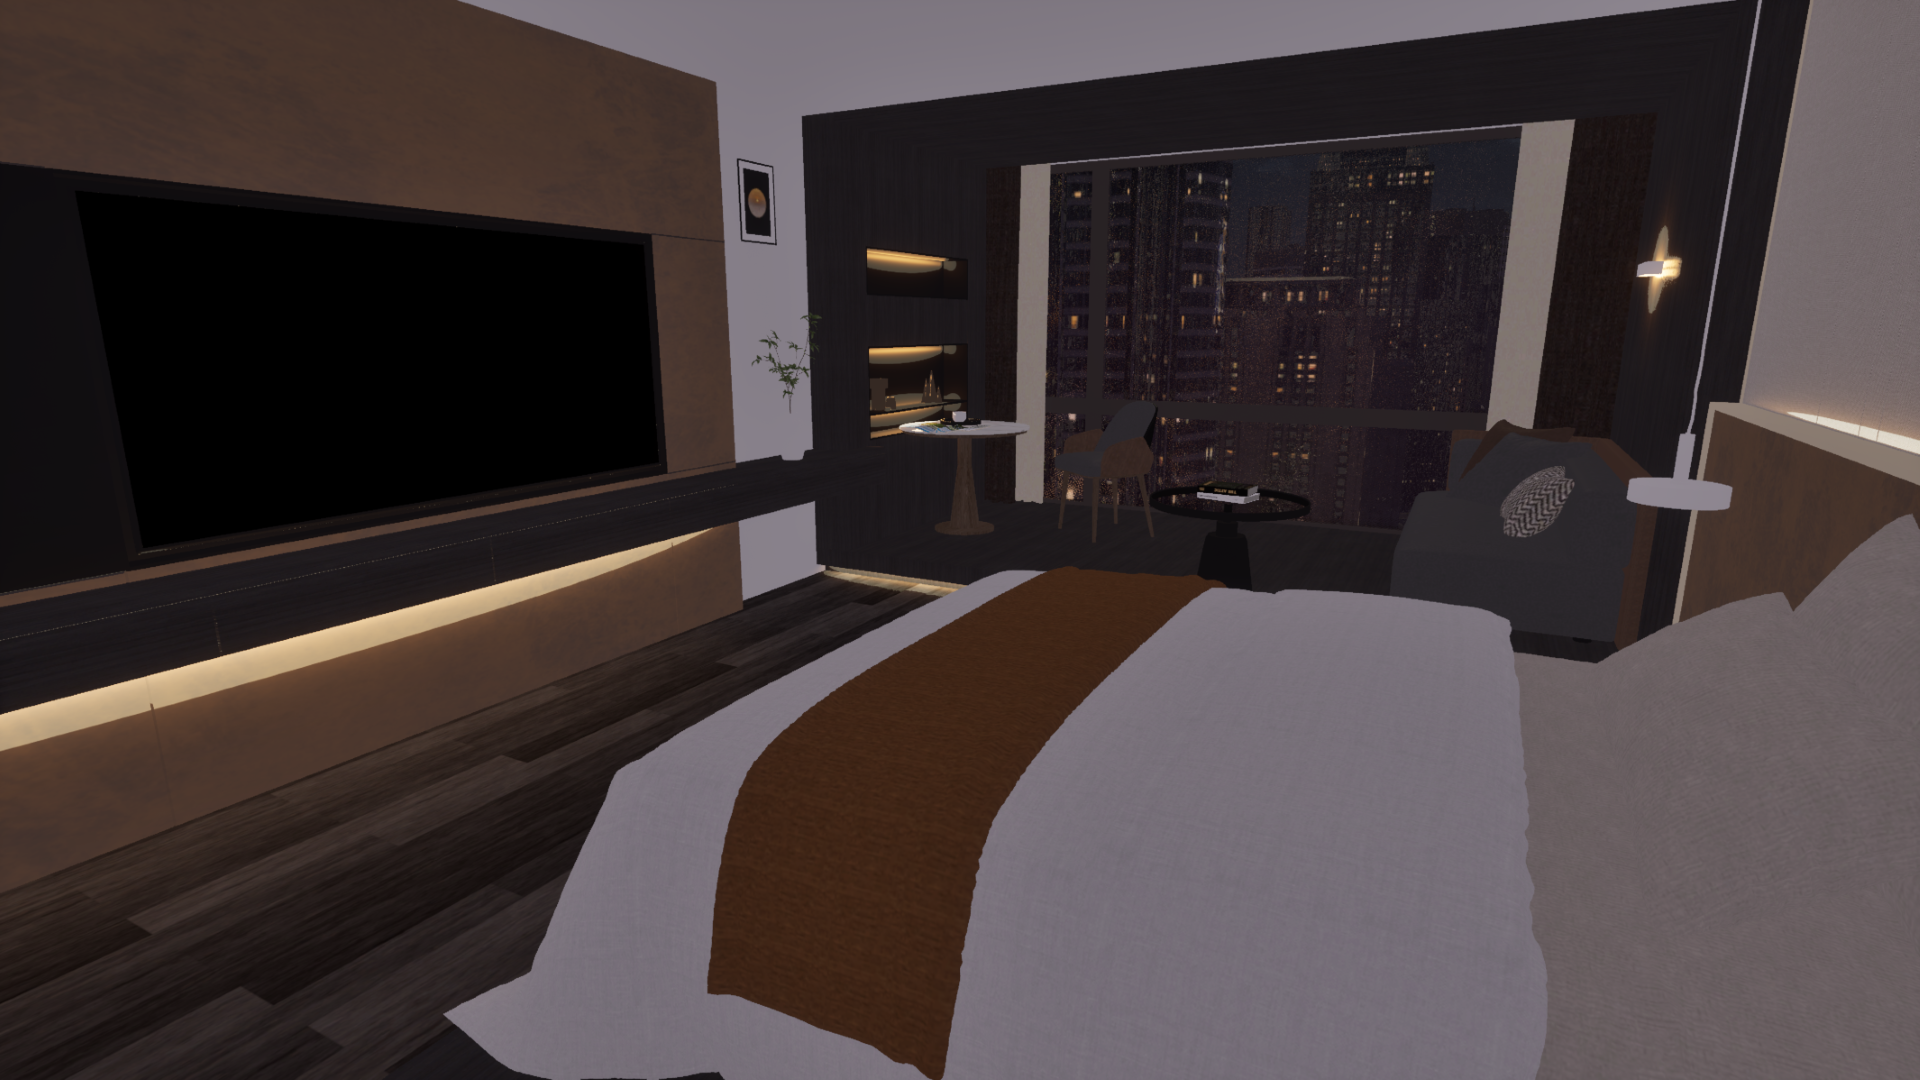 Tint Adjustment
The biggest hurdle during this process was the clash with Unreal Engine's core technology, Lumen. Lumen is Unreal Engine 5's flagship technology that integrates real-time Global Illumination (GI)—calculating how light bounces in a space—with Reflections. While it is flawless for photorealistic rendering, unfortunately, it was completely incompatible with our cel shading pipeline. The real-time, continuously calculating light data morphed into messy noise on our clean, simplified 2D planes. Ultimately, we made the tough decision to completely turn off Lumen.
However, turning off Lumen introduced another problem. While the screen became cleaner, reflection-dependent outdoor buildings received no environmental light, creating a severe sense of disconnection. We needed a way to maintain the 2D-specific flatness while still giving the impression that objects were naturally placed within a spatial environment.
So, instead of calculating real light, we decided to fake the indirect lighting effect using Fake Reflection data. This fake reflection utilized camera-view-based vector math. We sampled the color and brightness information of an environment map (HDRI) using nodes that react in real-time to the angle at which the camera views the surface, such as Camera Vector or Reflection Vector. We then plugged this resulting value directly into the material's Emissive Color.
By structuring the nodes this way, we could make it look as though objects in the scene were softly receiving environmental reflections, without any heavy real-time light calculations. By lightly blending back the original rendered image, we found the optimal compromise where emissive details survived while maintaining the flat 2D nature.
You can see the difference before and after implementing this vector-based fake Reflection in the comparison images below.
 Before Fake Reflection
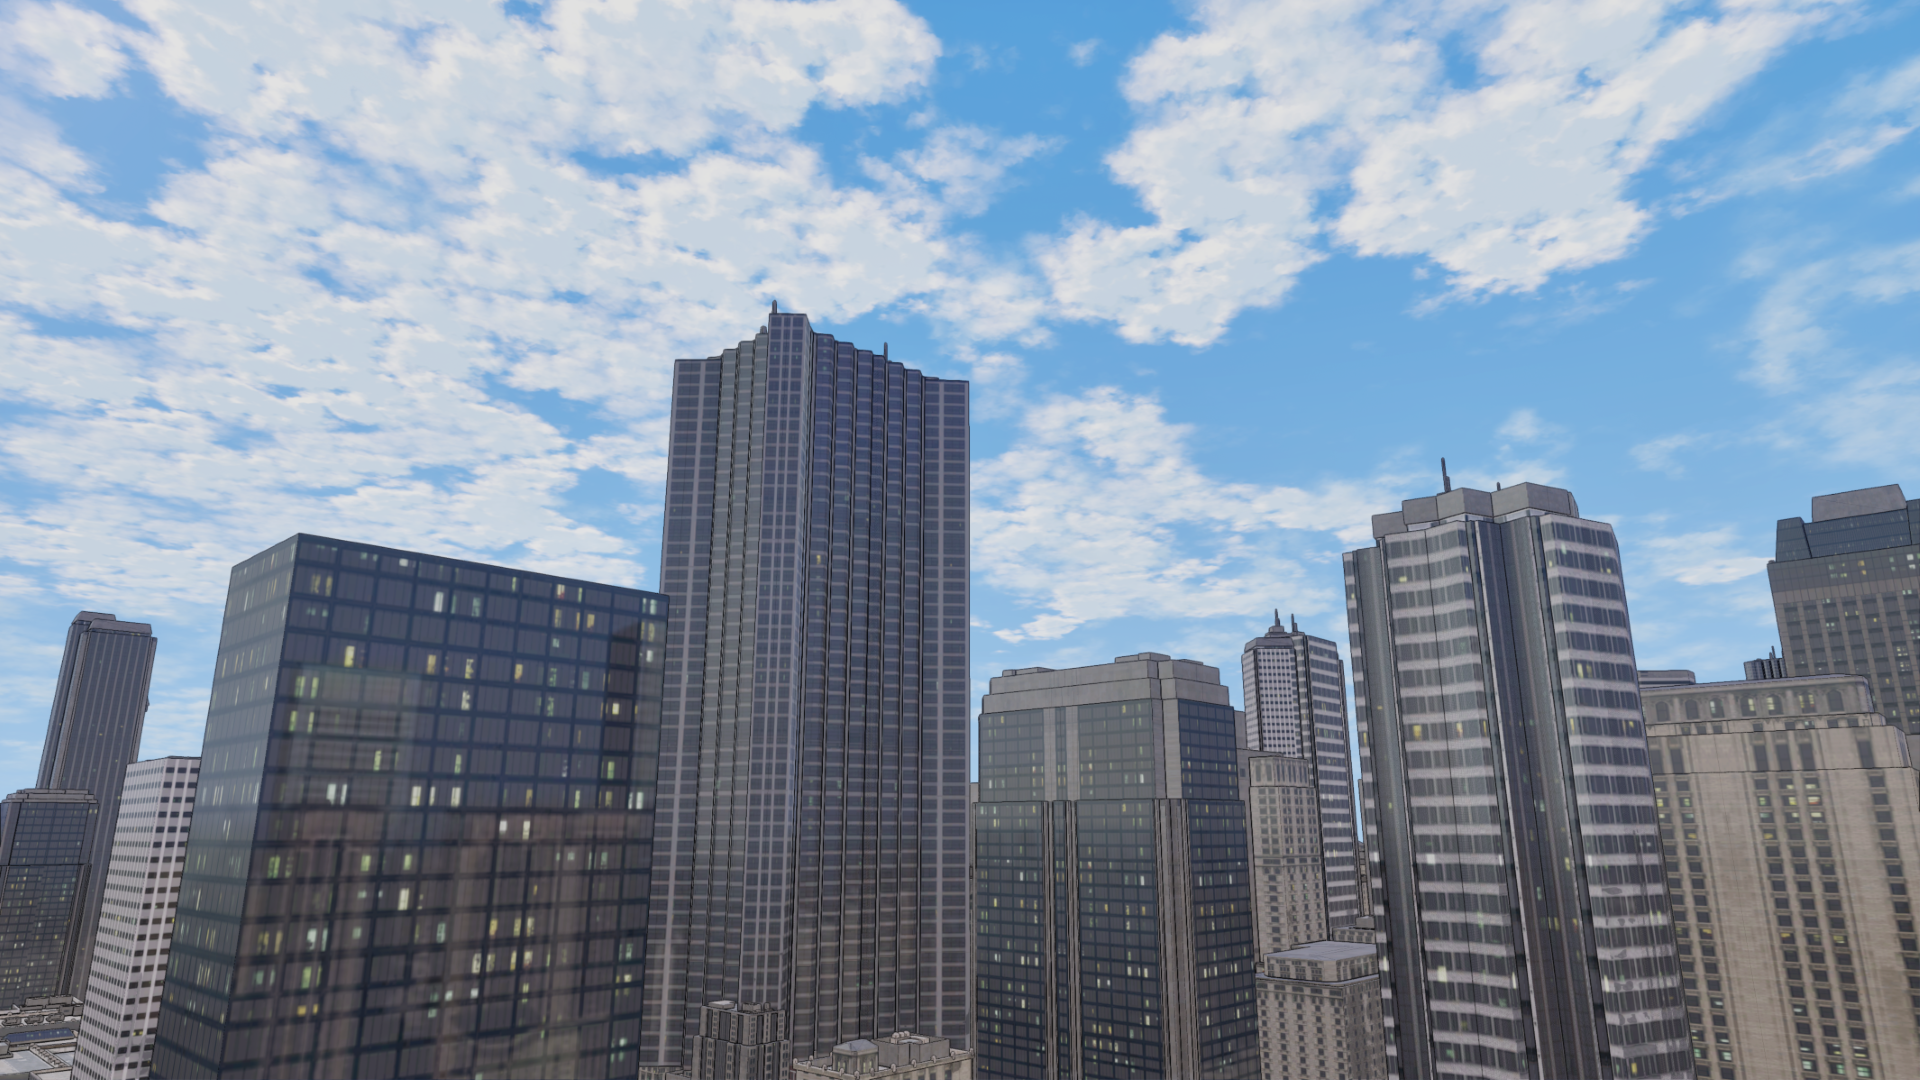 After Fake Reflection (Sky and building reflections applied)
However, there were still limitations to this approach. Since the foundation of the screen is ultimately the Base Color driven by texture maps, if the original Albedo textures were photorealism-based, their high-frequency details would remain, disrupting the clean cartoon planes. To fundamentally resolve this, we are currently testing methods to apply Posterization (Stepping) math directly to the Base Color to simplify its values, or compressing the descriptive density of the textures themselves apart from just the lighting.
Step 2. Drawing the Lines: Human-Like Pen Touches
Now that the planes are sorted out, it's time to implement the outlines. In webtoons, lines go beyond merely defining shapes; they are the core binding agent that ties the artist's 2D characters and the 3D backgrounds together as a single manuscript.
To extract the outlines, we utilized the Scene Depth buffer to draw lines at boundaries where the depth difference between adjacent pixels is large. While a Sobel filter sampling 8 directions is typically used to get smoother lines, we deliberately chose to sample only 4 directions (up, down, left, right). The uniquely rough and jagged aliasing effect of the 4-way cross-sampling actually matched the sharp texture of an artist's quick pen strokes much better.
Furthermore, to mimic human pen touches, we approached this with 2D aerial perspective in mind. When drawing distant objects by hand, artists tend to omit details, loosen their grip, and draw fainter lines. We translated this into mathematical values, designing the shader so that the line thickness naturally decreases as the distance from the camera increases.
 Depth Outline
Additionally, to capture not just the outer silhouettes but also the fine internal details of objects, we utilized pixel angle difference data (World Normal). This method draws a line where the surface normal vector bends sharply. This is exceptionally useful for soft internal depictions like fabric folds or wood grains.
Looking at actual webtoon manuscripts, artists use lines differently depending on the situation. While they use solid black ink to strongly define shapes, they also mix in Colored Lines that naturally blend with surrounding colors for internal details. We added a parameter that allows us to blend the object's Base Color into the internal outlines extracted via normals. As a result, flexible line direction suited for any situation became possible.
 Colored Normal Line Implementation
However, using both Depth and Normal-based outliners together caused an immediate issue. In places like the outer edges of buildings, where both distance and angle differences occur simultaneously and significantly, the two shaders drew overlapping lines. To resolve this phenomenon where line thickness became uncontrollable and messy, we designed an overlapping prevention (Culling) logic using an IF node.
First, we normalized the calculated Normal Edge values between 0 and 1. A value closer to 0 implies smooth internal details, while a value closer to 1 signifies a sharp, strong boundary. Based on this data, we set the conditions for the IF node as follows:
[IF Node Setup]
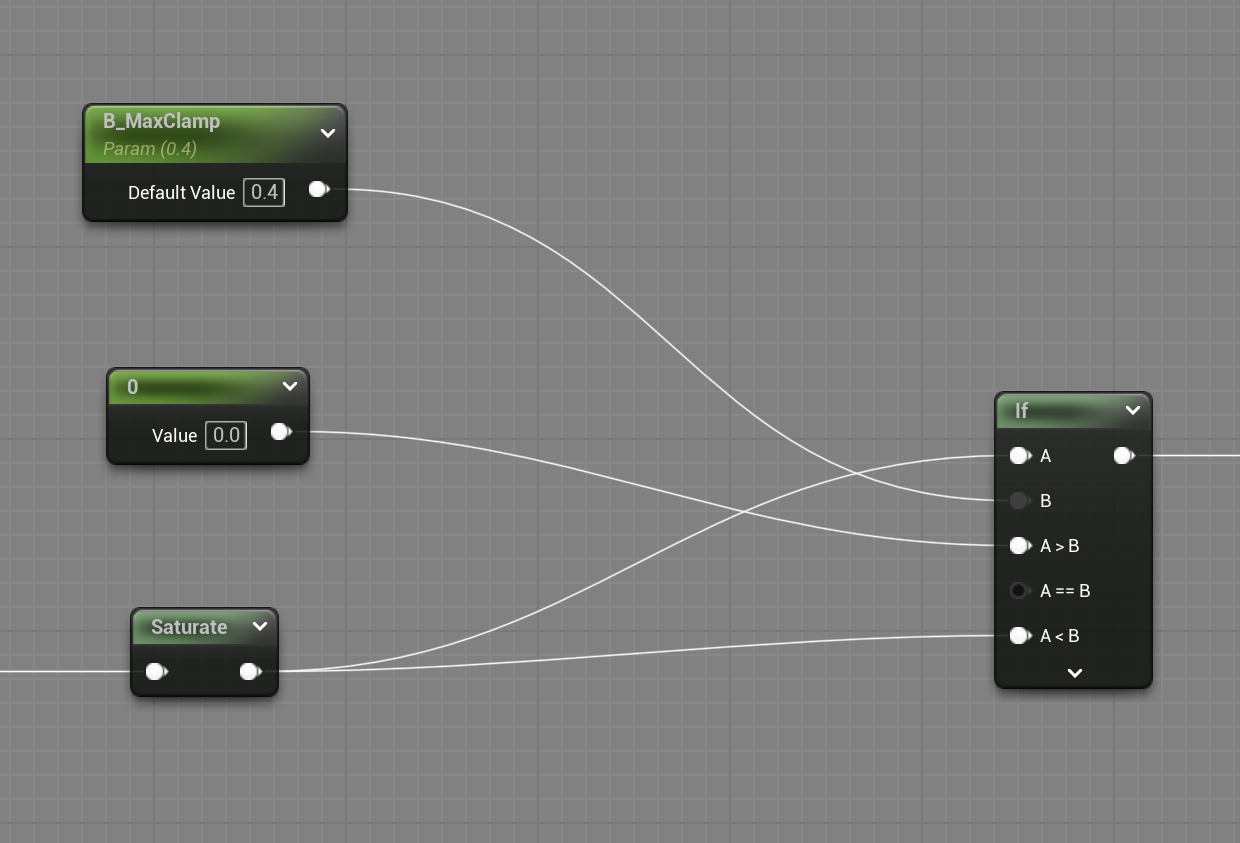
- A: Calculated Normal Edge value
- B: 0.4 (Threshold)
- If A > B: Output 0 (Erase the line)
- If A < B: Output A (Keep original data)
The logic behind this formula is simple. An edge value of 0.4 or higher means the surface directions from the 4-way sampling clash and bend quite sharply. There is a highly probable chance that the Depth shader has already drawn a thick outline on such a strong corner. Therefore, data exceeding the threshold (0.4) is boldly erased, preserving only the subtler data below it. (Of course, we parameterized this 'B' value so artists can fine-tune it according to the scene.)
Thanks to this intuitive culling logic, the thick, smudged overlapping lines completely disappeared, leaving only the beautifully delicate and necessary internal folds on the screen.
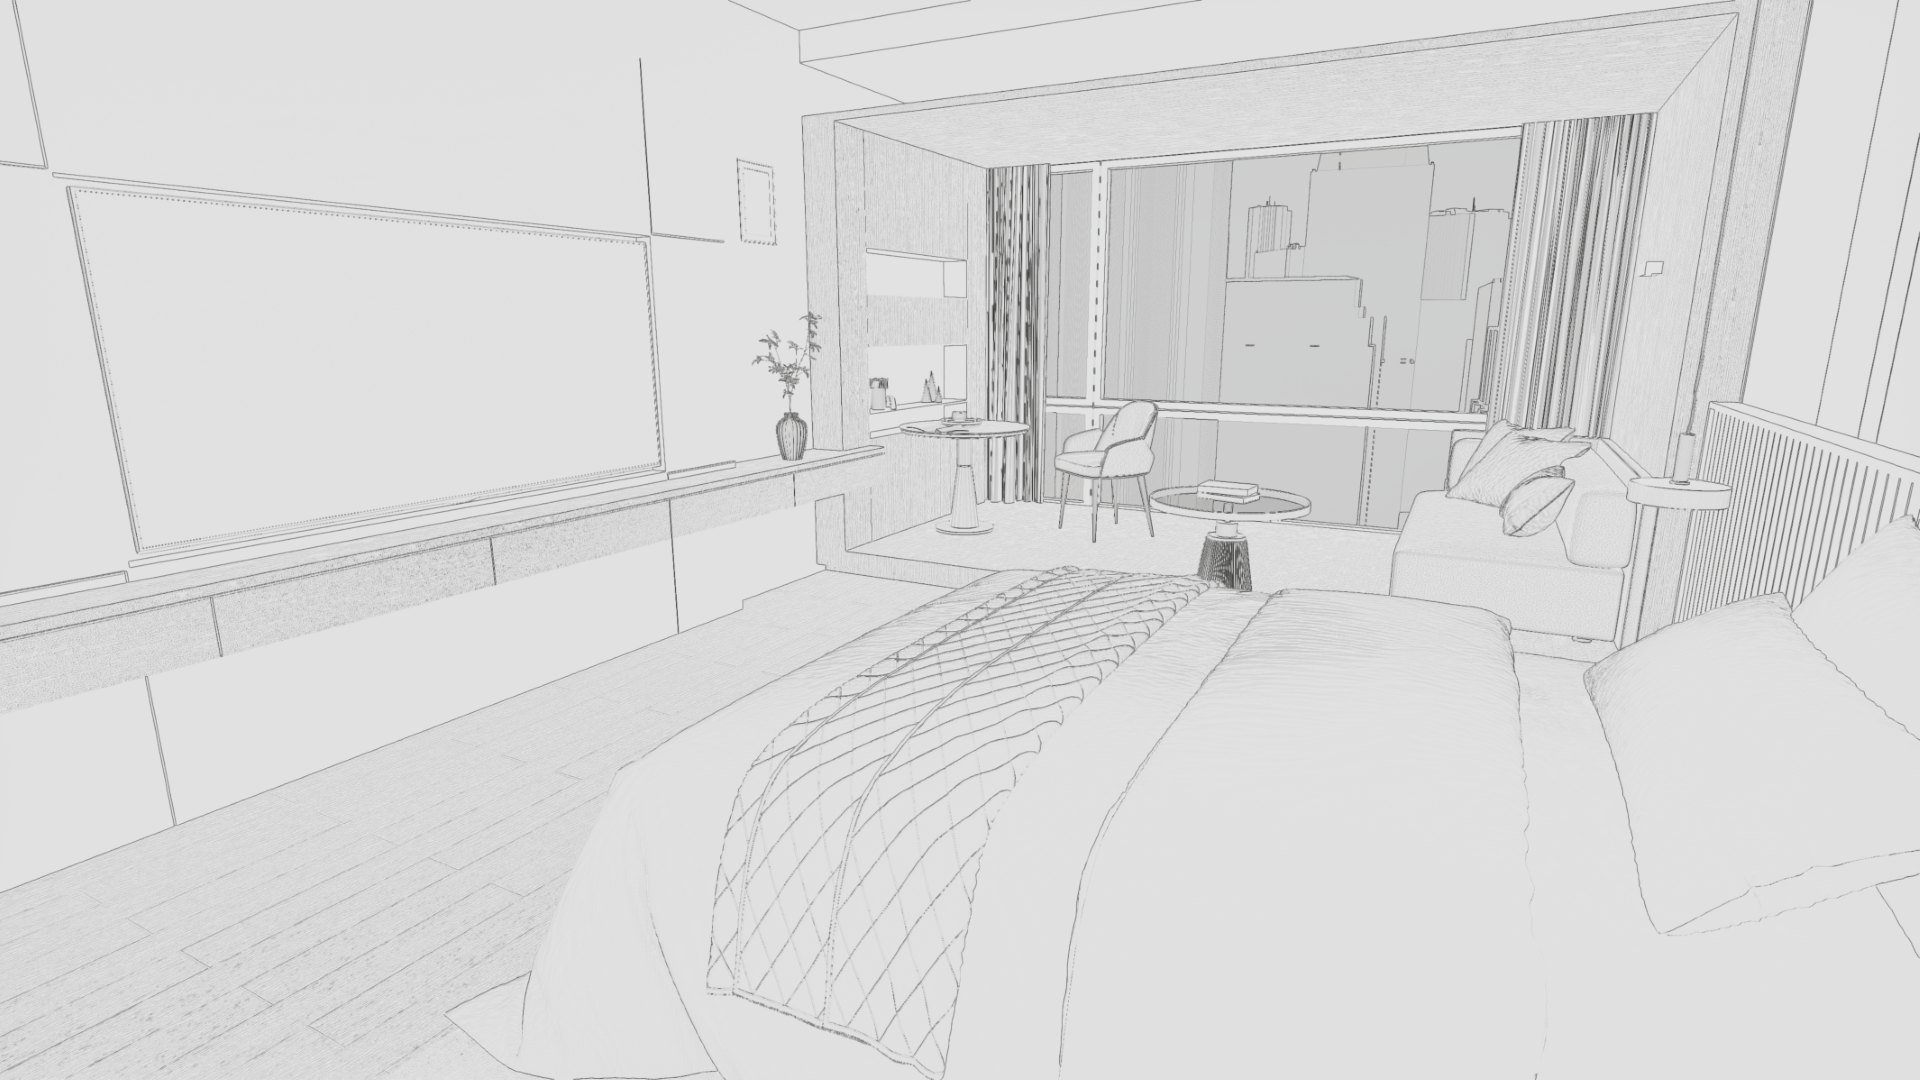 Before IF Node
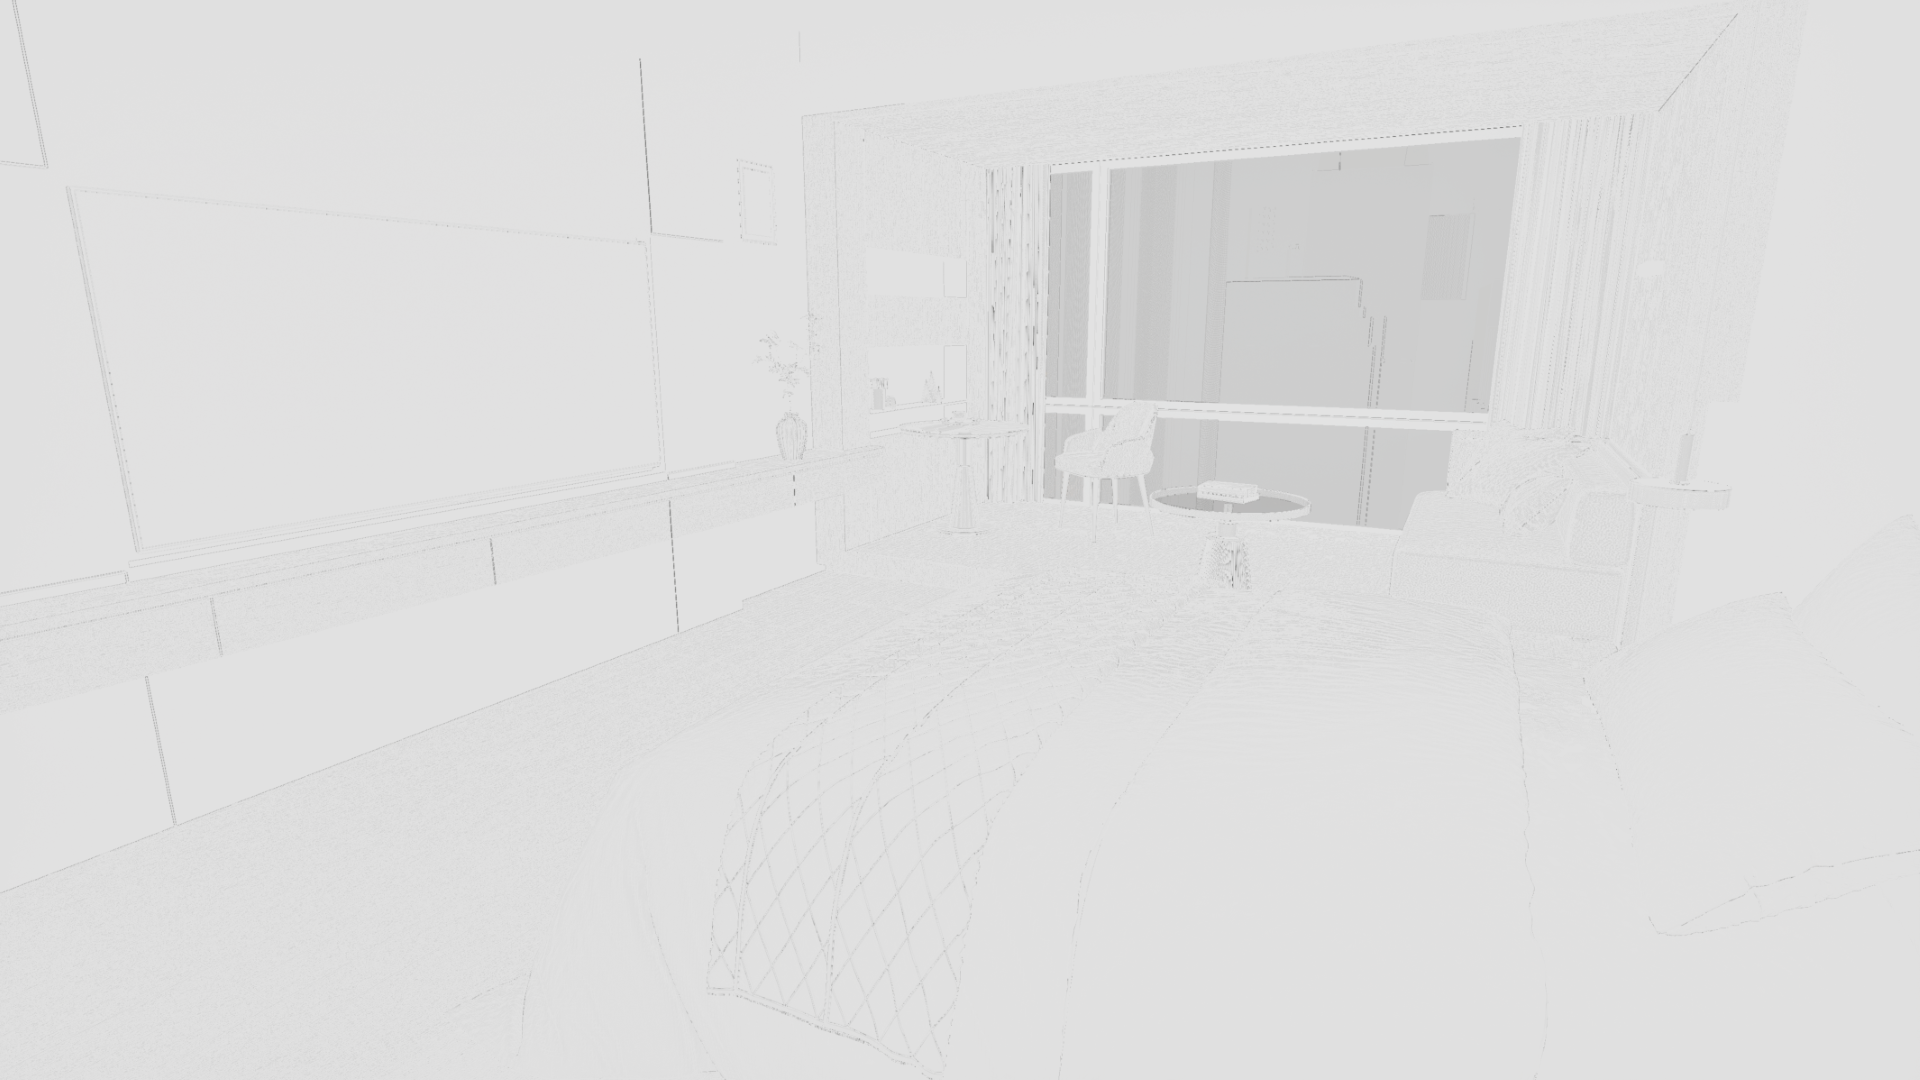 After IF Node Before Outlines (Step 1 only)
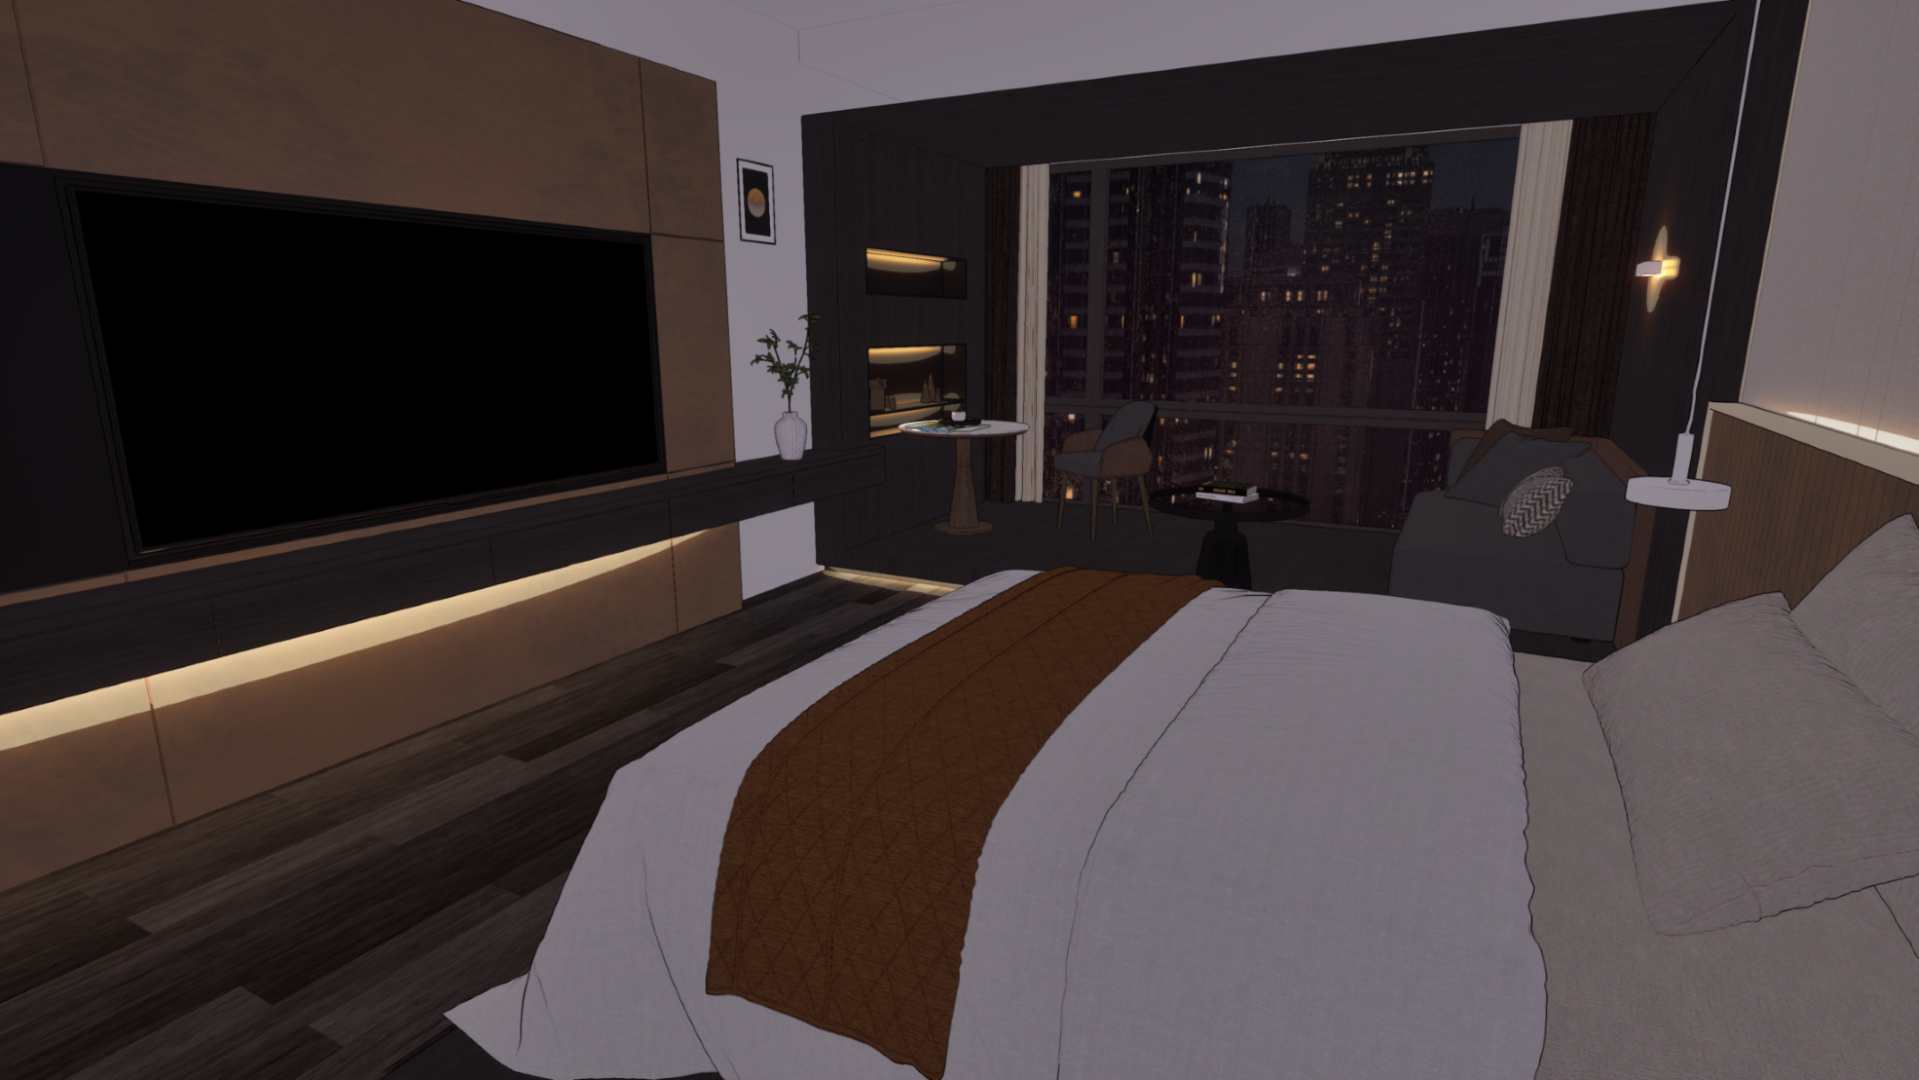 After Outlines (Step 1 + Step 2)
You can check out the outline shader logic explained in this article via the GitHub repository linked below. If you have better implementation methods or ideas for improvement, please feel free to share your feedback.
GitHub - Realdraw_Outline
Conclusion
Building this LookDev pipeline was more than just a technical quest of connecting Unreal Engine nodes; it was a process of letting go of the obsession with "photorealistic and perfect rendering" that we held as 3D artists.
We profoundly realized that for webtoon backgrounds, great technology is not about proving how closely it mimics reality, but rather about how seamlessly it can breathe within the artist's 2D manuscript without feeling out of place. It was only when we intentionally blurred the engine's mechanical perfection and translated the rough yet warm hand-drawn touch of a 2D artist into a shader that our entire team felt the 3D backgrounds finally gain life as a "comic manuscript."
Our ultimate goal is to completely tear down the boundary between 3D and 2D art, to the point where readers won't even realize "This is a 3D background" as they scroll through the webtoon. So that the characters born from the artist's pen can tread upon the spaces forged by Unreal Engine without any dissonance, we will continue to share our team's fierce deliberations and attempts toward achieving a look that fully permeates the webtoon manuscript.
Thank you for reading this long post.